

Creating your own DIY photo pendant necklace is a fun and rewarding craft that allows you to wear your cherished memories close to your heart. This personalized photo jewelry makes a perfect gift idea for birthdays, anniversaries, or any special occasion. In this guide, we’ll walk you through the easy steps to make a beautiful picture necklace that you’ll treasure forever. Keep reading to discover how to personalize your jewelry in a creative and meaningful way!
Article Outline
- What Is a Photo Pendant Necklace?
- Why Make a DIY Photo Pendant Necklace?
- What Materials Do You Need to Craft a Photo Pendant?
- How to Choose the Perfect Photo for Your Pendant?
- Step-by-Step Guide to Making a Photo Pendant Necklace
- Tips for Personalizing Your Jewelry
- How to Care for Your Photo Pendant Necklace?
- Gift Ideas Using Personalized Photo Jewelry
- FAQs About DIY Photo Pendant Necklaces
- Conclusion: Keep Your Memories Close
What Is a Photo Pendant Necklace?
A photo pendant necklace is a piece of jewelry that features a small photograph encased in a pendant. This allows you to carry a picture of someone special, a beloved pet, or a cherished memory wherever you go. These pendants can come in various shapes and sizes, such as lockets, charms, or even picture pendants. Making your own DIY photo pendant is an easy way to create a personalized photo accessory that reflects your unique style.
Different Types of Photo Pendants
- Lockets: Traditional pendants that open to reveal a photo inside.
- Glass Domes: Pendants with a glass cover that magnifies and protects the photo.
- Resin-Coated Pendants: Photos sealed with resin for a durable finish.
- Magnetic Pendants: Interchangeable photo pendants using magnets.
Why Make a DIY Photo Pendant Necklace?
Creating a DIY photo pendant necklace offers several benefits:
- Personalization: You can personalize the pendant with any photo you choose.
- Gift Idea: It’s a heartfelt gift idea for friends and family.
- Cost-Effective: Making your own jewelry is often less expensive than buying pre-made pieces.
- Creative Expression: It allows you to express your creativity and crafting skills.
- Sentimental Value: A photo necklace holds sentimental value that store-bought jewelry can’t match.
Quote: “Jewelry has the power to be this one little thing that can make you feel unique.” – Jennie Kwon
What Materials Do You Need to Craft a Photo Pendant?
Before you begin, gather the following materials:
| Material | Purpose |
|---|---|
| Pendant Tray or Bezel | Holds the photo and forms the pendant base. |
| Printed Photo | The image you want to display in the pendant. |
| Mod Podge (Sealer) | Seals and protects the photo. |
| Glue (Craft Glue or Adhesive) | Adheres the photo to the pendant tray. |
| Jewelry Chain or Cord | Forms the necklace. |
| Jump Ring | Connects the pendant to the chain. |
| Scissors | Cuts the photo to the correct size. |
| Paintbrush | Applies Mod Podge evenly. |
| Optional: Resin or Glass Cabochon | Adds a protective, glossy finish. |
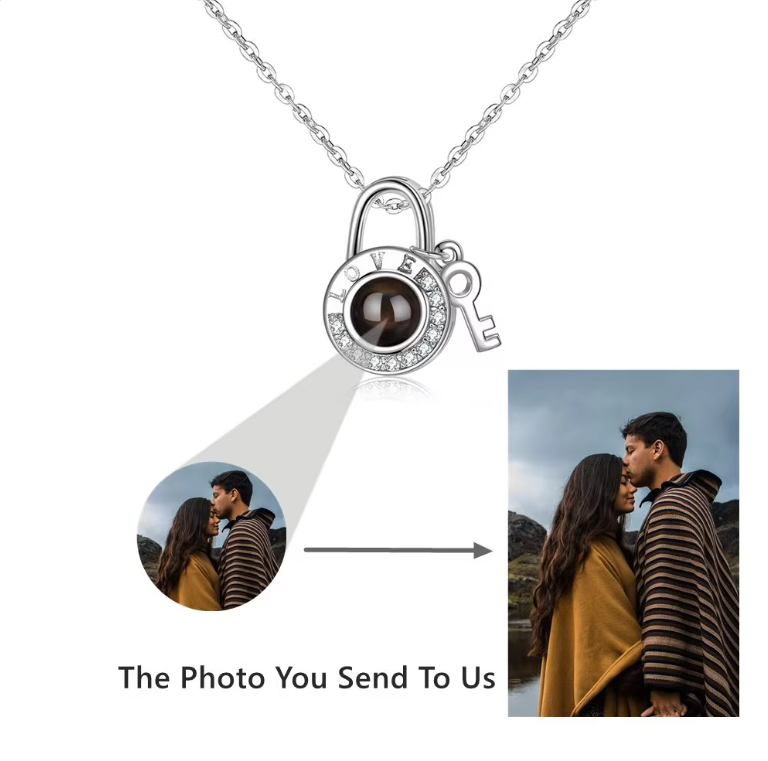
How to Choose the Perfect Photo for Your Pendant?
Selecting the right photo is essential for creating a meaningful photo pendant.
- Choose a Clear Image: The photo should be high resolution to ensure clarity.
- Crop If Necessary: Use a crop tool to focus on the main subject.
- Consider the Pendant Shape: Match the photo orientation (rectangular, square, teardrop) to the pendant tray.
- Size Appropriately: Ensure the photo fits the size of your pendant.
Tip: You can use photo editing software or apps to resize and adjust your photo before printing.
Step-by-Step Guide to Making a Photo Pendant Necklace
Step 1: Prepare Your Photo
- Print Your Photo: Use a high-quality inkjet printer on photo paper.
- Seal the Photo: Apply a thin layer of Mod Podge to the front and back of the photo to seal the photo and protect it from glue and resin.
- Let It Dry: Allow the photo to dry completely before proceeding.
Step 2: Cut the Photo to Size
- Trace the Pendant Shape: Place the pendant tray over the photo and trace the outline.
- Cut Carefully: Use scissors to cut out the photo along the traced lines.
- Test the Fit: Place the photo into the pendant tray to ensure it fits snugly.
Step 3: Adhere the Photo to the Pendant Tray
- Apply Glue: Use craft glue or adhesive to coat the bottom of the pendant tray.
- Place the Photo: Gently press the photo into the tray, smoothing out any air bubbles.
- Let It Dry: Allow the glue to dry according to the manufacturer’s instructions.
Step 4: Seal and Protect the Photo
- Add a Protective Layer: Apply a thin layer of Mod Podge over the photo to seal it.
- Optional – Use Resin or Glass: For a glossy finish, you can pour a small amount of resin over the photo or place a glass cabochon on top.
- Dry Completely: Ensure everything is completely dry before assembling the necklace.
Step 5: Assemble the Necklace
- Attach a Jump Ring: Add a jump ring to the pendant loop.
- Thread the Chain: Slide the necklace chain or cord through the jump ring.
- Secure the Clasp: Make sure the necklace clasp is securely attached.
- Finished Piece: Your personalized photo pendant necklace is now ready to wear!
Note: If you’re using a locket necklace, the process is similar but you place the photo inside the locket compartment.
Tips for Personalizing Your Jewelry
- Experiment with Shapes: Use different pendant shapes like rectangular, teardrop, or heart-shaped trays.
- Add Embellishments: Include charms, beads, or engravings to make your necklace unique.
- Use Different Materials: Try using resin or glass gems for a different look.
- Create Matching Sets: Make bracelets or earrings to match your necklace.
How to Care for Your Photo Pendant Necklace?
Proper care ensures your photo pendant necklace lasts a long time.
- Avoid Water Exposure: Remove the necklace before swimming or showering to prevent damage.
- Store Properly: Keep it in a jewelry box or pouch to prevent scratches.
- Clean Gently: Wipe with a soft cloth; avoid using harsh chemicals.
Gift Ideas Using Personalized Photo Jewelry
A custom necklace makes an excellent gift for various occasions:
- Mother’s Day: Show appreciation with a photo of a cherished family moment.
- Birthday: Celebrate with a personalized photo necklace featuring a special memory.
- Wedding: Commemorate the big day with a photo from the ceremony.
- Anniversary: Remind your loved one of a special time together.
Don’t forget: Handmade gifts carry sentimental value that store-bought items often lack.
FAQs About DIY Photo Pendant Necklaces
1. Do I need special equipment to make a photo pendant necklace?No, most materials like pendant trays, Mod Podge, and craft glue are available at craft stores or online on sites like Amazon.com. You don’t need much in terms of equipment.2. Can I use regular paper for the photo?While you can use regular paper, photo paper provides a better quality image. If using regular paper, be sure to seal it well.3. How do I prevent bubbles when sealing with resin?Apply the resin slowly and use a toothpick to gently pop any air bubbles that appear.4. Can I make pendants in different sizes?Yes, pendant trays come in different sizes and shapes. You can choose the one that best suits your design.5. Is it possible to personalize other types of jewelry with photos?Absolutely! You can create bracelets, charms, or even keychains using similar methods.
Internal Links for More Inspiration
- Personalized Photo Necklace
- Customized Photo Angel Wings Necklace
- Heart Shape Personalized Projection Necklace for Women
- Customized Picture Stainless Steel Bar Necklace
- Heart Shaped Romantic Necklace Jewelry
Alt: Customized Photo Angel Wings Necklace
Conclusion: Keep Your Memories Close
Making a DIY photo pendant necklace is not only an easy way to create beautiful jewellery but also a meaningful craft that allows you to keep your loved ones close. Whether for yourself or as a heartfelt gift idea, this project is both fun and rewarding. So gather your materials and start crafting your own personalized photo jewelry today!
Key Takeaways
- DIY photo pendants are a creative way to personalize your jewelry.
- Gather materials like pendant trays, Mod Podge, and printed photos.
- Follow the easy steps to assemble your photo necklace.
- Personalize further with charms or different pendant shapes.
- Care for your jewelry by avoiding water and storing it properly.
By following this guide, you now know how to make a photo pendant that is unique and special. Enjoy wearing your memories and sharing them with the world!